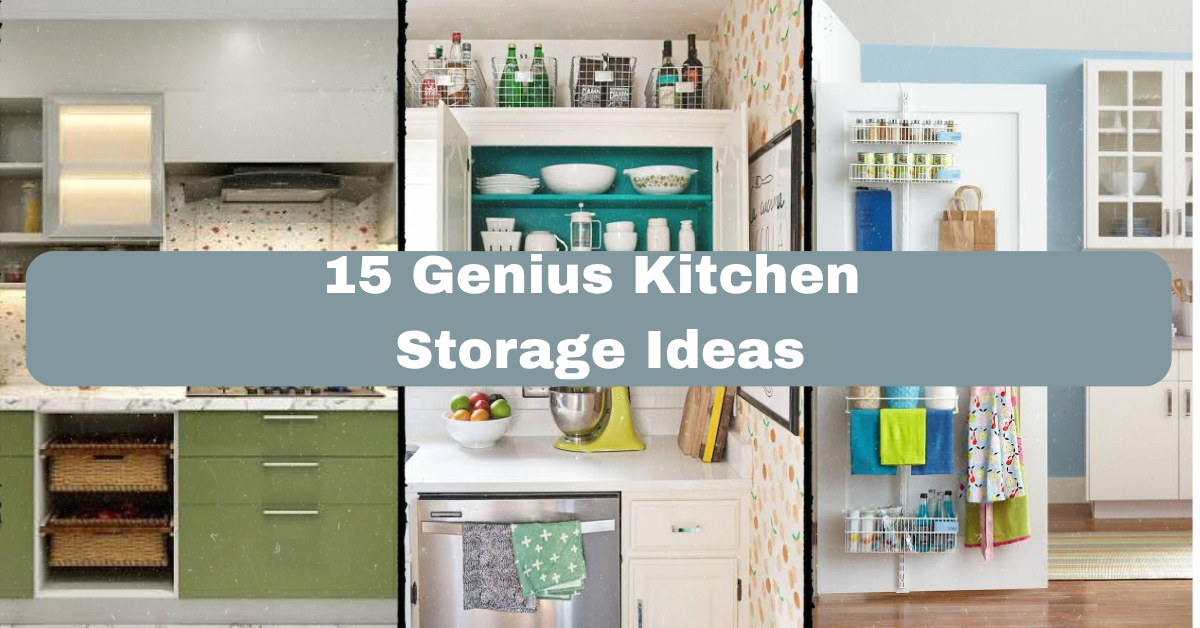
If you’ve ever dug through three drawers looking for a lid that matches your pot, I’ve got you covered. This roundup of 15 Genius Kitchen Storage Ideas is built to give you the most complete, practical answer out there, no fluff, just stuff that actually works in real kitchens.
Kitchen storage refers to the systems, furniture, and organizational tools used to store cookware, food, and small appliances in a way that keeps a kitchen functional. The best setups combine vertical space, drawer dividers, and labeled containers to reduce clutter and save time.
Stick around, because by the end of this post you’ll have a whole toolbox of ideas you can start using this weekend, no renovation required.
What Makes Kitchen Storage “Genius” Anyway?
I think the word “genius” gets thrown around a lot, but here it actually fits. Genius storage isn’t about buying more bins. It’s about using space you already have in a smarter way. Think about the dead zone above your fridge, the empty wall next to your pantry, or that awkward gap between your stove and counter. Good storage ideas turn those forgotten spots into workspaces. They also save you money, because you’re not buying duplicate tools you can’t find. Once you start seeing your kitchen this way, you’ll spot opportunities everywhere.
1. Install Pull-Out Drawers Inside Lower Cabinets
Deep lower cabinets are storage black holes. Stuff gets pushed to the back and forgotten. Pull-out drawers fix this instantly. You slide the whole shelf out, see everything, and grab what you need without kneeling on the floor.
Choose soft-close hardware so the drawers don’t slam. Painted white or natural wood interiors both work, depending on your cabinet finish.
Tip: Measure your cabinet depth before ordering drawer kits, since standard sizes don’t always fit older homes.
This works in modern kitchens with sleek cabinetry and in farmhouse kitchens with painted wood fronts. Next, let’s talk about the vertical space above your cabinets that most people ignore completely.
2. Use the Space Above Your Cabinets for Baskets and Bins
That gap between your upper cabinets and ceiling is prime real estate. Instead of letting dust collect there, add matching baskets or wooden crates. Store items you don’t use daily, like holiday platters or extra vases.
Pick baskets that match your cabinet tone so it looks intentional, not cluttered. Woven rattan works for coastal or boho styles, while metal bins suit industrial kitchens.
Tip: Use a small step stool to keep this zone easy to access, or you’ll end up avoiding it.
Traditional kitchens can use decorative crocks here too. Now let’s move inside the cabinet doors themselves, where a lot of hidden storage potential lives.
3. Add Door-Mounted Racks for Small Items
The inside of a cabinet door is wasted space in most kitchens. Adding a slim rack there gives you a spot for spice jars, foil boxes, or cutting boards. These racks mount with screws or adhesive strips, so no major installation is needed.
Choose a wire rack for a light, airy look or a solid metal one for durability. Either way, measure the depth so the rack doesn’t hit shelves when the door closes.
Tip: Use door racks on your under-sink cabinet for cleaning supplies, keeping them off the cabinet floor.
This trick fits almost any style since the rack stays hidden when doors are closed. Speaking of hidden spots, let’s check out the toe kick area beneath your cabinets.
4. Convert Your Toe Kick Into a Storage Drawer
The toe kick is that recessed space at the bottom of your cabinets, right above the floor. Most people never think about it, but it can become a slim pull-out drawer perfect for baking sheets, platters, or step stools.
This requires a bit of carpentry work, so it’s best done during a renovation or with a handy friend. The payoff is huge though, since you gain storage without losing an inch of usable cabinet space.
Tip: Use this drawer for flat items only, since the space is usually less than four inches tall.
It works especially well in small kitchens where every inch matters. Now, let’s compare a few storage solutions by budget so you can see what fits your plan.
Kitchen Storage Solutions by Budget
| Solution | Estimated Cost | Installation Difficulty | Best For |
|---|---|---|---|
| Adhesive door racks | $10–$25 | Easy, no tools | Renters, small kitchens |
| Pull-out cabinet drawers | $40–$150 per cabinet | Moderate, basic tools | Deep lower cabinets |
| Toe kick drawer | $150–$400 | Hard, requires carpentry | Renovations, small kitchens |
| Custom pantry shelving | $300–$1,200 | Hard, professional install | Large pantries |
| Magnetic knife strips | $15–$40 | Easy, wall mount | Any kitchen |
5. Hang a Magnetic Knife Strip Instead of Using a Block
Knife blocks eat up counter space and collect crumbs. A magnetic strip mounted on the wall or backsplash holds your knives in plain sight and keeps them sharp longer since blades aren’t rubbing against slots.
Wood-backed strips look great in farmhouse or traditional kitchens, while stainless steel strips blend into modern setups.
Tip: Mount the strip at a height where kids can’t reach it, but you still can without stretching.
This idea also frees up drawer space you were using for knives before. Let’s take that same magnetic concept and expand it to other tools.
6. Add a Pegboard Wall for Pots and Utensils
Pegboards aren’t just for garages. Mounted behind your stove or prep area, they hold pots, pans, and utensils on hooks you can rearrange anytime. This keeps your most-used tools within arm’s reach.
Paint the pegboard a color that pops against your wall for a decorative touch, or keep it matching for a subtle look. Industrial and farmhouse kitchens both use this trick often.
Tip: Trace your pot outlines on the board in pencil first so everything has a “home” and stays organized.
It’s a cheap upgrade that turns clutter into a display. Next, let’s shrink things down and talk about drawer organization specifically.
7. Use Adjustable Drawer Dividers for Utensils
Junk drawers happen because there’s no system. Adjustable dividers create lanes for spatulas, spoons, and gadgets so nothing turns into a tangled mess. Bamboo dividers look warm and natural, while plastic ones are easy to wipe clean.
Measure your drawer width before buying, since dividers that are too loose will slide around and stop working.
Tip: Group by function, not by size, so you grab the right tool without digging.
This one small change makes daily cooking noticeably less stressful. Now let’s look upward again, this time inside your pantry.
8. Install Floor-to-Ceiling Pantry Shelving
If you have a pantry closet, don’t waste the top few feet. Floor-to-ceiling shelves give you a spot for bulk items, appliances you rarely use, and backup supplies. Adjustable shelf brackets let you customize spacing as your needs change.
Light wood shelving suits coastal and farmhouse kitchens, while black metal shelving fits modern or industrial spaces.
Tip: Store rarely used items on the highest shelf and everyday snacks at eye level for easy grabbing.
This setup basically doubles your pantry’s storage without expanding the footprint. Let’s pair that with a smart labeling system next.
9. Label Everything With Clear, Matching Containers
Clear containers let you see what’s inside without opening a dozen lids. Transferring pasta, rice, and flour into matching jars also protects food from pests longer than the original bags.
Use a simple label maker or chalkboard labels for a farmhouse touch. Glass jars look elegant on open shelving, while stackable plastic bins work better in tight cabinets.
Tip: Buy containers in a few standard sizes so they stack neatly instead of creating a messy tower.
This idea works in literally every kitchen style since it’s about function first. Speaking of stacking, let’s talk about a specific trick for pots and pans.
10. Store Pots and Pans Vertically With Dividers
Stacking pots inside each other scratches the finish and makes it hard to grab the one on the bottom. Vertical dividers, either in a drawer or a cabinet, let you slide pans out individually without disturbing the rest.
Look for dividers with rubber-coated edges to prevent scratching your cookware.
Tip: Store lids separately in a lid organizer nearby so they don’t cause chaos in the pan section.
This works especially well in kitchens with wide, shallow drawers instead of deep cabinets. Now let’s check out a comparison of common cabinet organizer types.
Cabinet Organizer Comparison
| Organizer Type | Best Use | Material Options | Approximate Price |
|---|---|---|---|
| Lazy Susan | Corner cabinets | Plastic, bamboo, metal | $15–$45 |
| Tiered shelf riser | Canned goods, spices | Wire, plastic | $10–$30 |
| Vertical pan divider | Baking sheets, pans | Metal, wood | $20–$50 |
| Under-shelf basket | Extra shelf space | Wire | $8–$20 |
| Lid organizer rack | Pot and pan lids | Plastic, metal | $10–$25 |
11. Add a Lazy Susan to Every Corner Cabinet
Corner cabinets are the most wasted space in most kitchens. A lazy Susan spins so you can reach items in the back without unloading everything in front. Two-tier versions hold even more.
Wood lazy Susans fit traditional kitchens nicely, while white plastic ones disappear into modern cabinetry.
Tip: Measure the cabinet’s swing radius before buying, since corner cabinets vary a lot in size.
It’s a small purchase that eliminates a lot of frustration. Let’s move from cabinets to your countertop next.
12. Mount a Rolling Cart for Extra Counter and Storage Space
If your kitchen is short on counter space, a rolling cart adds both storage and prep surface. Store it against a wall and pull it out when you’re cooking or hosting.
Metal carts with wire baskets fit industrial styles, while wood carts with woven baskets suit farmhouse or coastal kitchens.
Tip: Add wheels with a locking feature so the cart doesn’t roll away while you’re chopping vegetables.
This flexible piece can move rooms too, which makes it great for renters. Let’s finish up with a few more high-impact small changes.
13. Use Tension Rods to Create Extra Cabinet Shelves
A cheap tension rod, the kind used for curtains, can create a divider inside a cabinet to stand up baking sheets, cutting boards, or trays vertically. It costs almost nothing and takes two minutes to install.
Tip: Add rubber grips to the ends of the rod so it doesn’t slide when you open the cabinet.
This works in any kitchen style since it’s invisible once installed. Now let’s look at hanging storage for one more space-saving win.
14. Hang a Pot Rack From the Ceiling
If you have high ceilings, a hanging pot rack keeps cookware visible and off your shelves entirely. It works especially well in kitchens with limited cabinet space.
Iron racks suit farmhouse and industrial kitchens, while sleek stainless versions fit modern spaces.
Tip: Hang it above an island, not a walkway, so nobody bumps their head.
This idea turns your pots into part of the decor. Last but not least, let’s talk about small appliance storage.
15. Build an Appliance Garage on the Counter
An appliance garage is a small cabinet on your counter with a roll-up or swing door that hides your toaster, blender, or coffee maker. It keeps counters clear while still keeping things within reach.
Tip: Add an outlet inside the garage so appliances can stay plugged in.
This works great in modern and transitional kitchens where clean lines matter most. With all these ideas combined, your kitchen can go from chaotic to genuinely organized.
Tips for Success
- Start with one zone at a time instead of trying to overhaul your whole kitchen in a weekend.
- Measure everything twice before buying organizers, since cabinet sizes vary more than you’d expect.
- Group items by how often you use them, keeping daily tools at eye level and rare ones up high or down low.
- Choose materials that match your cleaning habits, since wood needs more care than plastic or metal.
- Don’t fill every inch of space immediately. Leave a little room for new items you’ll bring home later.
- Revisit your system every few months, since habits change and storage should change with them.
Common Mistakes and How to Avoid Them
Buying organizers before measuring
: Always measure cabinet width, depth, and height first, then shop for organizers that fit those exact numbers.
Storing rarely used items in prime spots
: Reserve eye-level shelves and easy-to-reach drawers for things you use daily, not the fondue pot you use once a year.
Ignoring vertical space
: Look up and down in every cabinet and closet. Add shelves or risers anywhere there’s unused air space.
Using mismatched containers
: Stick to two or three container styles so your pantry and cabinets look organized instead of thrown together.
Overloading a single storage solution
: Spread weight and items across multiple organizers instead of cramming everything into one basket or drawer.
Similar Variations
- Pantry Zone Systems – Organizing food by category (breakfast, baking, snacks) instead of by container type.
- Open Shelving Kitchens – Skipping upper cabinets entirely in favor of exposed shelves for a lighter, airier feel.
- Butler’s Pantry Storage – A separate small room dedicated to overflow dishware, small appliances, and pantry goods.
- Minimalist Kitchen Storage – Keeping counters completely bare and storing everything out of sight for a clean look.
- Farmhouse Crate Storage – Using wooden crates and baskets as the primary storage method instead of built-in cabinets.
Kitchen storage doesn’t have to mean a full renovation. Small changes, like a pegboard, a lazy Susan, or a few adjustable dividers, add up fast and make cooking feel less like a scavenger hunt. Pick two or three ideas from this list, try them this week, and build from there. That’s really the whole secret behind these 15 Genius Kitchen Storage Ideas.
Leave a Reply